Wattle & Daub: Craft, Conservation & Wiltshire Case Study
Contents
Contents
2 History
3 Craft
3.3 Panel Types
3.4 Staves
3.6 Daub
3.7 Decoration
4.1 Soils
4.1.1 Constituents
4.1.2 Plasticity
4.1.3 Strength
4.1.4 Field Testing
4.1.5 Selection
4.2 Dung
4.2.2 Lignin
4.2.3 Urine
4.2.4 Microbial Debris
4.2.5 The Role of Dung
4.3 Fibre
5.2.3 Maintenance
5.3 Repair
5.3.1 Partial Renewal
5.4 Replacement
5.4.1 Brick Infill
5.4.2 Renewal
6.3 Fieldwork
6.5 Evaluation
| Title Page Previous Next | Craft >Frame Preparation |
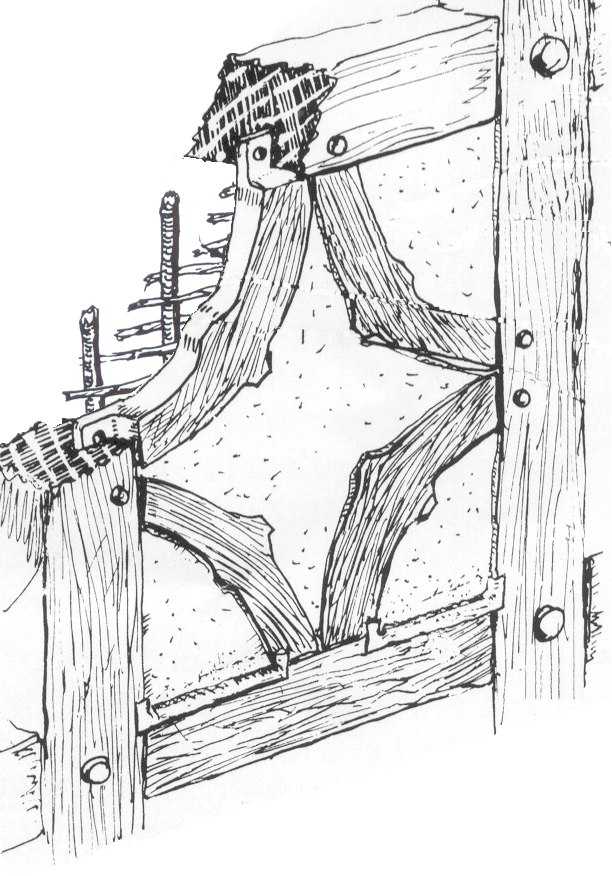
3.2 Frame Preparation
Before the dauber could carry out his craft, it was
necessary for the carpenter to provide the correct detailing to his frame in
order to accept the staves of the wattle panel. The bottom timber would be
either part of a cill beam, mid rail (bressumer) or nogging and, before
construction, the carpenter would gouge a long continuous groove along the
centre-line of its upper face. The top of the panel may similarly have been
formed by a mid rail or wall plate, onto which the carpenter would use an auger
to prepare holes spaced approximately 250-450mm apart, ensuring that one was
placed 0-50mm in from each end. Less commonly, the stave holes were made into
rectangular mortices, rough v-groove mortices or a continuous v-slot gouged on
the soffit (underside) to match the lower rail [Figu[22]].22
Sometimes, the end staves were run into the same mortice as the adjacent
structur[23]
timber.23
The carpenter frequently provided additional grooves along the inside faces of
the posts or studs to accept laths or, occasionally, the ends of withies [Figure 9].
 |
 |
||
 |
|||
|
|
|
||